HOW TO REINFORCE STONE COUNTERTOPS, PORCELAIN, DEKTON, QUARTZ, MARBLE, ETC. PT 2
Techniques for Reinforcing Stone Countertops
1. Fiberglass Mesh for Stone
Some natural stone slabs may have internal impurities that may result in the stone cracking. To reduce the risk of this happening, fiber mesh is used to reinforce them.
Fiberglass mesh is used to reinforce stone slabs by applying the mesh evenly across the back (or underside) of the stone and affixing it with an epoxy product. The fiberglass mesh strengthens the stone and makes it more resistant to cracking from the impurities that might be inside the Stone.
2. Rodding Stone Countertops
The sink cutouts result in narrow strips of stone bordering the opening. These areas often require a significant amount of reinforcement. However, these are not the only areas where bracing can be beneficial. Depending on the slab, there may be other areas of the stone that could benefit from substantial reinforcement.
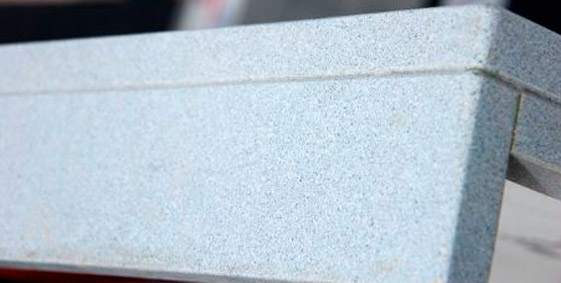
3. Steel Rodding
The first rodding option is steel rodding. Reinforcing stone using steel rodding is straightforward. Simply cut a slot in the underside of the stone slab where you want to reinforce it. Then place the strip of steel rodding in the slot and completely cover the rodding with epoxy. It is important to completely encase the steel rodding in epoxy to prevent oxide jacking.
Oxide jacking is a chemical reaction that can result in the stone breaking from pressure buildup due to the reaction occurring in a very tight space. One way to protect your slabs from oxide jacking is to use a rust-proof material.
4. Fiber Rodding
Fiber rodding is used in the same way as steel rodding. However, it will not rust. Since oxide jacking is the result of a chemical reaction that occurs when rusting takes place, using fiber rodding made from rust-free material serves as a protection against breakage from oxide jacking. There is more than one kind of fiber rodding including:
• Fiberglass Rodding
• Carbon Fiber Rodding
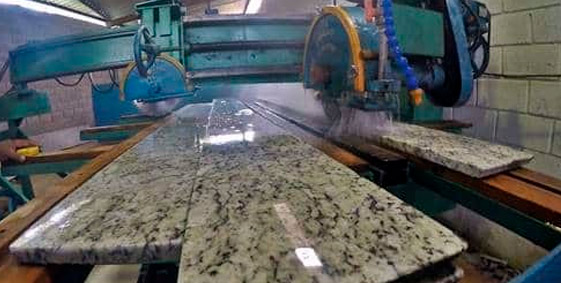
The importance of having adequate equipment to cut dekton and porcelain
Why do products such as Dekton need special/different tools than those that are used for cutting granite and marble?
Material hardness is the key to understanding why you need different tools to fabricate Dekton. The material has a
The cutting process requires trimming the edges to release tensions. Then you have to follow cutting recommendations, which include using plenty of water, the proper speed, feed rate, etc. Once you follow the rules, it’s a piece of cake.


In this sense, Dekton’s edge is very easy to work with since the material is very homogeneous, and it is easy to get very good results. Any fabricator can do it well on the first attempt.
What are some common mistakes that fabricators are making when it comes to cutting this material? And, what are some common mistakes with doing edging or doing sinkholes or something?
The main mistake is trying to fabricate Dekton as if it was a granite or quartz composite. You will fail if you use the same tools, speed rates, and so on. Another common mistake is trying to cut Dekton in uneven support. It is a common source of problems too.
Sometimes people ask about what machine is best to cut Dekton. I believe the key is not the machine but the tools and proper maintenance. I have seen people with very modest equipment doing amazing things and the other way around.
7 Keys for Cutting Ultra-Compact and Sintered Dekton and Porcelain Materials


It may seem too simple or too intuitive to matter, but less than adequate water AND hoses positioned incorrectly is the most common error causing headaches among cutting these materials.
One of the more overlooked aspects of successful cutting is, to the degree that your table is not level in the horizontal plane, vibrations will occur. This unevenness can result in chipping and likely breaking the edge of your slab.
As cliche, as it may sound, choosing the right blade for the material you are processing, is critical.
While each manufacturer of ultra-compact and sintered porcelain materials may, or may not have tensioning strips built into the perimeters of each slab, if they are not removed before cutting, the slab is at higher risk of cracking or breaking.
Using the same feed rate and RPMs you may be accustomed to when cutting other materials can be a recipe for trouble. Unlike fabricating more common materials such as marble and granite, we’ve seen the most success cutting ultra-compact and sintered porcelain materials when following a systemized approach is used.
While plunge cutting tends to be of little concern for most sawyers when cutting ultra-compact and sintered porcelain materials it can pose big problems resulting in cracking or breaking your slab.
Projects requiring a sink cut-out can be an obstacle many fabricators dread. Since we already know plunging is not the ideal way to go about this, what are your options? When preparing a sink cut-out, it is advised to drill each of the four corners with a 1/2” core bit before to start initiating cutting.

PORCELAIN FOR YOUR HOME, TILES
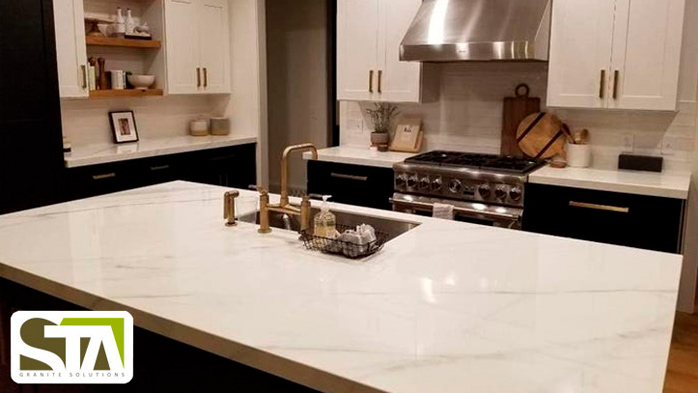
PORCELAIN FOR YOUR HOME, COUNTERTOPS FOR YOUR KITCHEN
DEKTON FOR YOUR HOME, FLOORS, AND PAVEMENTS
- 1
- 2
- 3
- 4
- 5
- 6
- 7
- 8
- 9
- 10
- 11
- 12
- 13
- 14
- 15
- 16
- 17
- 18
- 19
- 20
- 21
- 22
- 23
- 24
- 25
- 26
- 27
- 28
- 29
- 30
- 31
- 32
- 33
- 34
